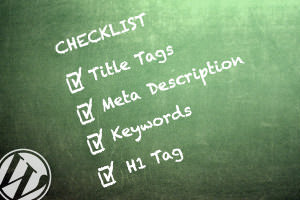
 WordPress SEO (Search Engine Optimization) doesn’t need to be difficult. If you follow the simple steps detailed below you will have built a solid foundation for your on-page optimization. All of the steps listed here are completely “white hat” and Google friendly. They are fundamentals that should be performed for each of the posts or pages that you create to ensure they are properly categorized by the search engine crawlers.
Here is our seven step checklist for correct WordPress SEO:
Step #1: Use correct title tags
The title tags are one of the most important on page SEO elements. The title tag will appear in three different places: In the search engine results, the browser and on external pages. In WordPress if you don’t choose your own title tag it will enter the default option. This can make it difficult for readers to determine what exactly the content of your page is. When selecting a title tag you want to use a description which best fits the content of the page and to include any keywords that you might be targeting. For example if you were targeting the keyword “Paleo diet recipes” you might use as your title tag “Top 10 paleo diet recipes”.
Step #2: Alter your permalink structure
The permalinks are the permanent URLs to your blog post, categories and archives. If you are using the initial WordPress design the permalinks will be set to the default structure which typically looks something like – http://testwebsite.com/?p=132. Obviously this doesn’t tell the search engine spiders very much at all about your content. A better permalink would be – http://testwebsite.com/category/postname. Click on settings–>permalinks in your admin panel to make changes to your permalink structure. You can choose from a variety of preset structures including default, day and name, month and name, numeric and custom structure.
Step #3: Use keywords in your post URL
WordPress gives you the ability to customize the URL for your posts. It is a good idea to include keywords that you want to target in your URL. Typically you can use a similar URL to the one that you have used for your title tags. So for example if we are targeting the keyword “WordPress site” we might make our URL http://testsite.com/build-a-wordpress-site.
Step #4: Write a meta description for your post and pages
The meta description summarizes the content of your post or page. The description will appear in the search engine results below your title tag. Having a compelling description will increase the number of people who click on your search results and read your page or post. It is also a good idea to include any keywords that you are targeting in your description as this can help with your on-page SEO. The default WordPress install does not allow you to add meta descriptions to your tags and so you will need to download a plugin which allows you to do this. Below is a list of great WordPress SEO plugins:
Either one of the above plugins will allow you to easily add meta titles, tags and descriptions to your content. Once you have installed the plugin you will find empty fields below the post or page where these details can be entered.
Step #5: Install a XML sitemap plugin
An XML sitemap tells search engines what pages are present on your site and changes that have been made. This is important for ensuring that all of the pages on your site have been properly indexed. WordPress makes creating and submitting an XML sitemap very easy with the free Google SEO Sitemap plugin. Once you have installed this plugin, every time you create a new page or post it will automatically submit the sitemap to the main search engines.
Step #6: Setup up Google Authorship
Google authorship is a great way of adding credibility and name recognition for your site. When you setup Google authorship your site will be linked to your Google+ account. In the search engine results your picture will appear next to your title tags and meta description. This can help to improve clickthroughs to your page. Linking your Google+ account may also benefit your search engine rankings for your content.
While the steps mentioned above are relatively straight forward if you perform them for each post or page they can make a significant difference. If you have difficulty with these steps feel free to call CHRS Interactive and talk with WordPress designer to discuss your options and how we can help you make the alterations for you. Whether you perform the SEO yourself or hire a WordPress expert to do it for you, make sure that you complete each step of this checklist. By getting your on page SEO correct your WordPress site will be better optimized than the majority of your competitors.

